Monday, December 30, 2013

Random Year-End Lithops Photos, and a Key Lime Pie Plant

Not much to do after Boxing Day except clean house, and prepare oneself for work and another year that is sure to be filled with...adventures, right? Hope it's more peaceful than 2013! Here are some Lithops photos that didn't make the blog this year, but should have, if I'd known what to say about them.
Young Lithops and a Conophytum
Interestingly, one of my most popular posts is about this guy, the Key Lime Pie Plant, aka Adromischus cristatus.
Adromischus cristatus, the Key Lime Pie Plant.
And to encourage more Lithops Art, here's a final image from 2013:
Paint them, sculpt them, photograph them! Love them!
The sunrise has been extra beautiful on my sand dune lately, and I thought I would share one at the end of the year....

Have a wonderful New Year's celebration and see you all in 2014!


Saturday, December 28, 2013

Lithops Activity and Weekend Walkabout with Vultures

My long-dormant Lithops karasmontana has finally begun to fully regenerate. Resorption of the old leaves on the second leaf pair has finally begun!
We've had such a hot winter, that the indoor Lithops haven't been getting much direct sun (they scorch in their pots) and this has confused them. The outdoor Lithops are doing better, as they get colder temps at night and can handle the full, hot sun, as they are in the ground, and don't scorch quickly the way potted Lithops can. Ah well.

I had a fine weekend walkabout (well- midweek vacation walkabout) with vultures and herons. Vultures are symbolic of spiritual cleansing and rebirth for quite a few religions and cultures. They are gentle and seem to enjoy meeting hikers. Occasionally, they like to chew on car tires, though, which is a bit rude. Fortunately, they didn't care much for my car. Here is a photo of Black Vultures and Turkey Vultures. Though they are different species, they like to hang out together.

And here's a lovely Great Blue Heron, looking for an aquatic lunch.
Have a wonderful weekend!


Monday, December 23, 2013

Happy Holidays!

Have a wonderful winter holiday, everyone! Here's my 2013 Christmas photo featuring a key member of my garden; Babytoes.
And for newer readers who missed last year's photo, it's the Three Lithops:
Happy Holidays and Happy Gardening!


Thursday, December 19, 2013

Tillandsia Care Part III: Care of the Pups

Tillandsias reproduce via flowers/seeds, and via offsets, or pups. If you grow Tillies indoors, the latter is the method of reproduction you'll encounter most often. Tillandsias only bloom once in their lives, and then they offset.
Some Tillandsias, like the T. abdita above, and T. ionantha fuego, will redden up and become very Christmasy just before they bloom. Then the flower appears....

Some time after flowering, from weeks to months, a pup will appear. Some are very well-hidden, and others are obvious. As you may know from previous posts,  pups can form at the base or from the center of the mother plant. Some emerge from the side. There's a tremendous level of variation.
Tillandsia caliginosa with side pup, MR

Tillandsia magnusiana with base pup, MR

Tillandsia butzii with base pup, MR
Most pups will stay stubbornly attached to the mother plant, and this is just fine. They should remain attached until they are 1/3 to 1/2 the size of the mother plant. Then, if you want to remove them, do so by twisting the pup very gently at the base with a slight downward pull. You can cut them at the base with a very sharp, small knife, but this can damage a pup if you're not very careful.

Some pups fall off the mother plant when they are very tiny. T. karwinskiana does this, as does T. albertiana and several other species. These pups tend to be tiny. They are easily lost.
Tiny pups in the palm of my hand. Just a few mm big!
In nature, I think these tiny pups get blown to, or fall on, a larger Tillie or plant and grow quietly to size over a long period of time. For your indoor garden, if you spot pups like this, perch them on a larger Tillie, and mist/water with the host plant. They will continue to grow.
Free pups housed with some Tillandsia caput medusae.


There are pup mysteries, though. For example, my T. xerographica bloomed months ago, and I still can't find an offset. Anywhere!
When I solve this mystery, I'll be sure to let you all know.


Sunday, December 15, 2013

Chef Riccardo's Taste of the Garden: Veggie Lasagna

More and more people around the world are going vegetarian or vegan, at least for part of the week. It's good for our bodies and good for the planet! So I asked Chef Riccardo if he'd create a recipe once a month that highlights the good things we're growing in our gardens, and he said yes.

His first dish is an entree for the winter holidays, and it's one of my favorites, Veggie Lasagna. He created the recipe, and I did my best to cook it up in my subtropical kitchen-on-the-dune. I'm glad to say it turned out well, and I was able to photograph the process before the hungry hordes gobbled it up.

Chef Riccardo's Veggie Lasagna:
3 red peppers, sliced
1 eggplant, cubed (Mediterranean or Japanese style both work well.)
100 gm (about 1 cup) sliced white or baby portobello mushrooms
2 medium onions, chopped
3 green or yellow zucchini, halved and sliced (I used both colors.)
1 bunch of asparagus
200 gm peas (7 oz.)
500 ml (one pint) bechamel sauce, homemade or ready-made
1 ball of mozzarella, sliced thin or grated
lots of grated Parmesan cheese
3 T. extra virgin olive oil
butter
500 gm (one pound) lasagna noodles (homemade or commercial)
Fresh pasta isn't too hard to make at home.

Got everything ready? Follow along with me and let's make this!
Saute' the onions with the oil and add the mushrooms, then a few minutes later, the zucchini, red peppers, and eggplant. Cook, stirring occasionally.
Most of the veggies.

The veggies, chopped and ready for the pan (except for that lazy asparagus!).
When the veggies are cooked through and the onions lightly browned, remove from heat and salt to taste. Put in a bowl and set aside. Blanch the peas and asparagus in a pan of boiling water for a few minutes, then drain and chop the asparagus. Saute' these veggies as well, in butter, salt to taste, and set aside.
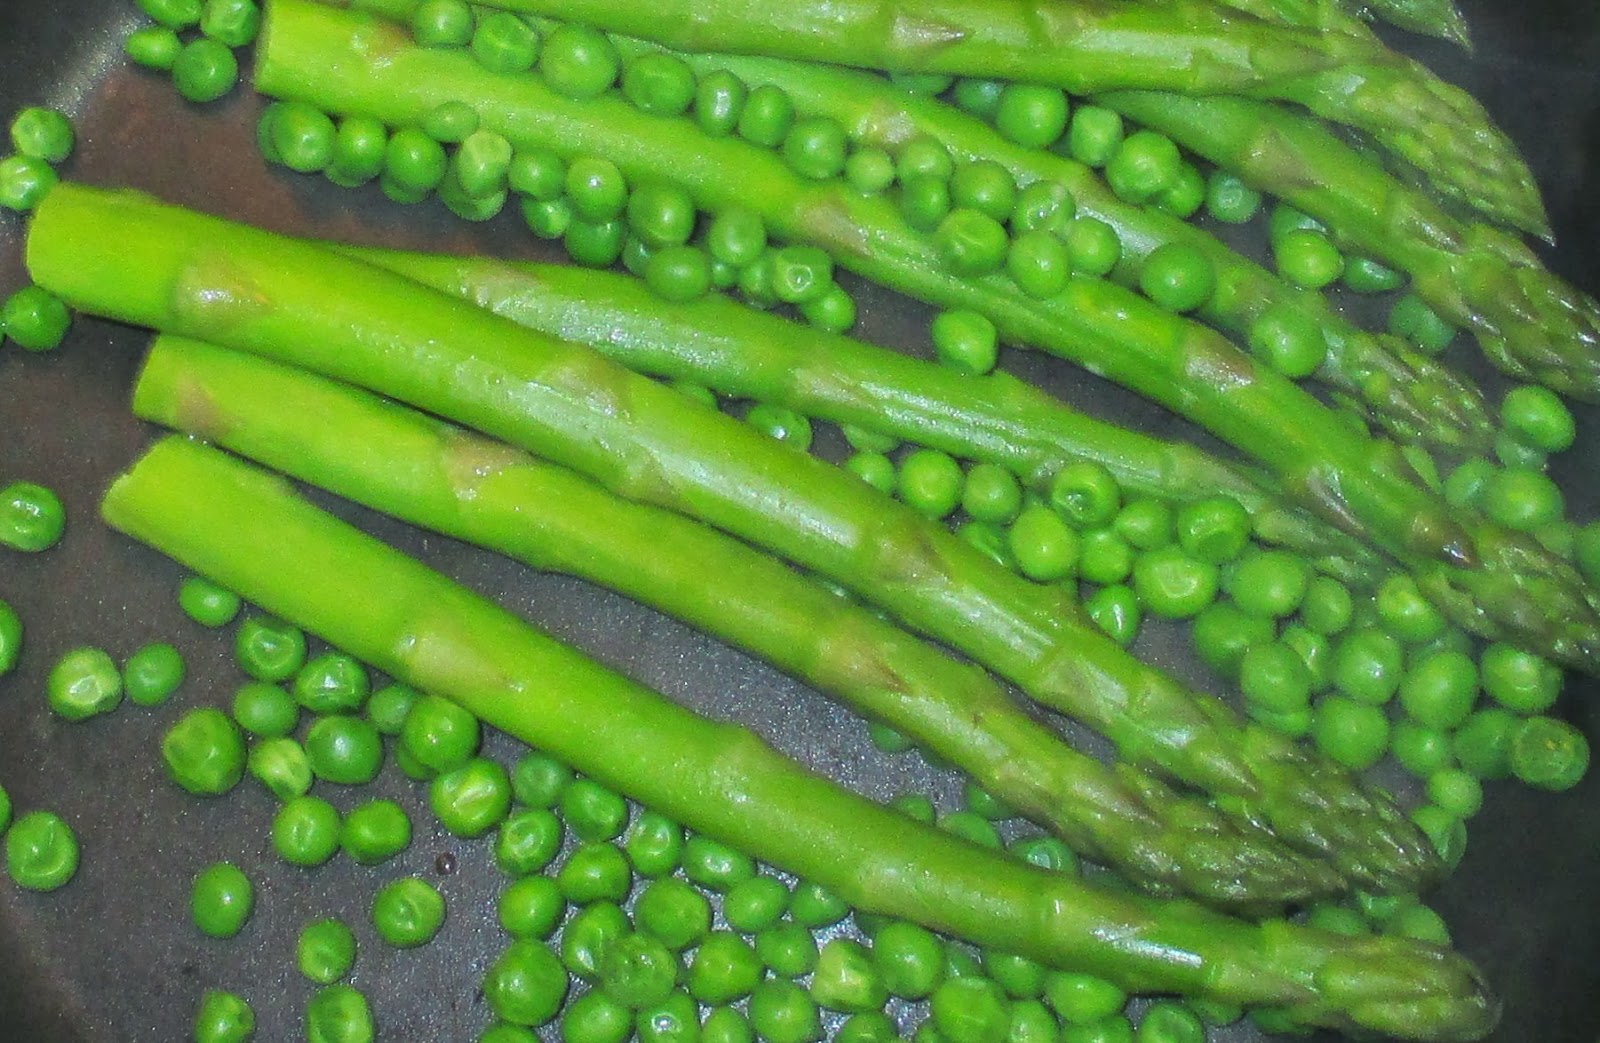
Blanched peas and asparagus, looking extremely green.

Sauteed and ready for layering. So colorful!
If you are using commercial lasagna noodles, parboil for about half the full time specified on the box, and set one layer at the bottom of a buttered lasagna dish or baking dish. If using fresh pasta, roll out as thin as possible, and do the same (don't parboil the fresh pasta, just use it directly).  Add a layer of the veggies, then mozzarella and parmesan. Cover this layer with bechamel sauce. You can make this at home or buy it ready to use. I learned to make a roux when I was seven years old, so I like to cook my own....
Bechamel sauce coming right up!
Then simply repeat the layers, pasta, veg, cheese, and sauce, until you run out of stuff. Sprinkle parmesan cheese on top and get ready to bake.  30-45 minutes at 200C, or 380F, should do the trick. Wait until the top is lightly browned.
Serve with fresh radishes and parsley for a lovely green-and-red holiday look. Enjoy!

And a big thank-you to Chef Riccardo for the best lasagna I've ever tried.


Friday, December 13, 2013

Freaky Friday the 13th: A Miscellany

I'm working on  parts III and IV of Tillandsia care, and I've got a great new monthly post coming on Sunday; it will be a tasty surprise! But for Freaky Friday the 13th, I've got a random collection of images I haven't been able to fit into the blog yet, so... it's Irrelevant Picture Time!
My last batch of ceramics features a new technique I made up. I carve a linoblock (this one is a 5x7 of my sunflower garden from this summer), imprint it onto wet stoneware clay, fire, and glaze. I think it worked rather well, and I'll keep trying new designs like this. I love carving linoblocks, but don't have much use for plain prints on paper. This gives the blocks new life.
I've got a number of my paintings on exhibit at our county library for a few months. This means there's more space in my studio to paint! Bwahaha....
I may have posted this lovely cottontail before, but I don't care, I love bunnies. For all you fellow rabbit fans, here's a portrait of a local English Angora, looking exceptionally fluffy....
Snuggle angora rabbits, don't wear them!
As you may notice, these sweet creatures have little to do with gardening, except for maybe the fact that bunny poop makes a wonderful soil builder. Not that Tillandsias would care about that. Let's see if I can find one more completely irrelevant image for the weekend....
Our sea-turtle nesting season went reasonably well this year, despite a lot of shore erosion that left little space for the nests. Here's the empty shell from one of the last hatchlings to leave for the sea...good luck, little guy!

Well, that's enough miscellany for now. I'm off to photograph some Lithops and Tillies....


Tuesday, December 10, 2013

Tillandsia Care Part II: Light and Air

Tillandsias need water, light, air, and some light feeding. They don't need dirt or darkness. Those principals are all you really need to grow beautiful Tillies, but I'm going into the specifics because I think more and more people are fascinated and ready to grow airplants indoors. They've been a popular outdoor plant in the tropics and subtropics since forever, but I get questions every day about how to grow them inside the house. Since they don't need dirt, and grow slowly, they make ideal houseplants. No dirt, no bugs, no mold, no muss, no fuss.
Outdoor Tillandsias, Doing Their Own Thing

T. magnusiana, Indoors
Tilladsias require varying degrees of light, as different species grow in different environments, from mountain heights to jungle valleys. But I find that all of mine have done well in bright, filtered light. They face east, and I've also tried northern windows (unfiltered). Both directions have worked well, though east is the best. West and south, the light would have to be more muted. However, if you live closer to the Poles than I do, a south or west-facing window might well be ideal. Hot afternoon sun is not so good for Tillies, and because they cannot sit in cooling, damp earth, they can "cook" more quickly in hot sun than other denizens of your indoor garden.

Tillies also need a lot of air circulation, just like Lithops and other mesembs. They are very pest-resistant but some species, like T. caput medusae and T. paucifolia, can rot at the base if they don't have fresh air.
Tillandsia caput medusae can easily rot at the base.

I have found that CD housing works beautifully for Tillies. I just make sure that, if the CD rack is metal, it's been sealed, as zinc and copper are toxic to Tillies. They are in a large, airy room with ceiling fans, next to an eastern window that can be screened if it gets too hot or bright.
A Tillandsia High-Rise Apartment Building.

So plenty of air, plenty of light, and you're all set! The next Tillie Care post will be about specific housings/mounts for Tillandsias, what works and what doesn't. See you then!

Saturday, December 7, 2013

Tillandsia Care, Part One: Tillies Need Water!

I've been getting so many questions about Tillandsia/Airplant care, that I'm embarking on a series for y'all. The first will be about how to water your Tillandsias. Some nurseries or unscrupulous stores will sell Tillies with the idea that, "all they need is air." I have heard this so many times it makes my eyes roll! This is very unfair to gardeners who are plunking money down for these plants, and of course, it's unfair to the plants, because they die. Tillies don't need dirt, but they sure need water!

My personal method, the Bucket Method, is illustrated in this post:
http://mylifeamongthelithops.blogspot.com/2012/09/watering-tillandsias-easy-way.html

I have lots of Tillies, so this works for me. Outdoor Tillies can be sprayed down with a hose every couple of days. But let's start at the beginning....
Tillandsias are New World epiphytes, so they live in a variety of climates. Some live in lush rainforests, others in arid semi-deserts. Some live high up in trees where they get lots of sun, others, down low where there's nothing but shade.


Tillandsias use CAM respiration, just like succulents and cacti. They take up CO2 at night, rather than during the day, and they lose very little water from their stomata. This means they can go for long periods without any water. But more than 10 days and they'll start to take on damage. A dry month or more can mean death for many species. The tips of the leaves will brown and curl, the plant will seem very dry, like a cornhusk, and drought spots will appear within the leaves.

I don't have enough time to keep my 100 Tillies on separate watering schedules, so I bucket-water them about every 4-5 days, then mist them every day they aren't bucket-watered. This has kept them very happy so far. I add special Tillandsia fertilizer to the water on the first watering of the month. Tillie fertilizer has no boron, zinc or copper, all of which hurt them. Many commercial orchid fertilizers are fine for Tillies, and some cactus fertilizers are OK, though the one I use is specially compounded by a Tillandsia nursery in California. I make sure the water is very slightly acidic, about 5.5pH. If you live in a hard water area like I do, just add 4-5 drops of white or rice vinegar to every liter of water, and you'll be in the ballpark. Mist with filtered tap water or rainwater.

Don't let the plants sit in water, ever. They won't be able to respire if they are always wet, and if water is kept on the base, or bulb, of the plant, it will rot. Some Tillies, like T. intermedia, T. caput medusae, or T. xerographica, should be drained/dried on their sides or upside down so they drain properly and don't retain water.
T. intermedia, drying upside-down.
And never leave your Tillies sitting in water for more than 60 minutes. Soggy is not good for them.


Tillandsias respire mostly at night, so it's best to water in the morning or afternoon. That means their leaves are nice and dry by the time they have to do their main gas exchange.

Please feel free to leave any questions in the comments section. The next care guide post will be about light and placement of Tillandsias within the home.

Wednesday, December 4, 2013

Harvest Time: How Creative Are You, Really?

Harvest time comes late to the subtropics.  We're in the middle of squash, herb, and pepper season. Oh, and string beans. But I'm sick to death of string beans.

So many squash! Such great prices! But I only know two ways of cooking zucchini and yellow squash: I saute' them with butter and a little garlic salt, or grate them for Greek zucchini pancakes or sweet and spicy zucchini bread. Was that three ways? Never mind. Two weeks into zucchini season I was bored to bits with them. But the price was so low, I kept buying out of a false sense of economy. Plus, I had bowls full of herbs from the garden and I was all tinctured out (see previous posts).
Iconic Photo of Garden Herbs, MR
I was getting desperate and so was my bursting-at-the-seams refrigerator, so I emailed my wonderful friend from Italy who shall be referred to as "Chef Riccardo". You can give Chef Riccardo three random ingredients, and I mean any three, and he'll come up with a masterpiece. You can have nothing to eat but rutabagas, molasses, and old grapefruit rinds, and he'll come up with something so scrumptious your friends pay you for the recipe....

Rutabagas (Wikimedia)
So I sent him the list of what was in my fridge, and begged him for a recipe. He started riffing on the Sicilian dish peperonata. He got creative with it..., and then I got creative with it. The result was not particularly traditional, but exceptionally delicious.
Peperonata Variation, Halfway There....
Lots of zucchini and yellow summer squash, lots of Vidalia onions (nice and sweet). Small red potatoes, and instead of bell peppers (allergic!) I added some very piquant fresh Florida chilis from a garden down the street (yes, I asked the gardener first). I stir-fried them with olive oil, salt, and pepper, then added a coarse puree of basil (Italian and Thai). Fantastic! I would show a photo of the finished (and very spicy) dish, but by the time I had my camera set, the food had been dished out by eager friends and family, and it was already in their mouths! How rude.... But you get the idea.

So a big hug and Thank You to my delightfully creative friend Chef R, an admonition to my friends and family to curb their enthusiasm until I take a picture, and my hope that you'll find ways to be equally creative with your garden harvests this season.

Monday, December 2, 2013

Basic Lithops Care for New Lithops Guardians

Many gardeners who read this blog know far more about the mysteries of the Lithops than I do. They can ignore this post. But for those of you who have recently bought, or been given, some Lithops, I thought I'd post on some of the basics that I've learned over the last couple of years. Feel free to add useful advice in the comments section!
Your first question on bringing your Lithops (which has probably been labeled "Living Stone", "Living Rock" or something like that) home may be, "What do I do with this thing?" That's a reasonable question. First off, if your Lithops is growing in ordinary potting soil, and that soil is damp or wet, it's time to repot. Most Lithops do well in soil that is not very nutritious, and has amazing drainage. I use a mix of cactus soil, perlite, and pumice, with some granite gravel. This way if I give them too much water, or they get too much rain, the water drains quickly and the Lithops don't burst or rot.

Apart from the initial re-potting, Lithops don't like being repotted or moved around much. In fact, such things can lead to Lithops Mush Syndrome. They grow slowly, so repotting is seldom necessary anyway.

Now on to watering. They don't like it much. I water weekly during their growing season. I never let them sit in water for even a few minutes. I do water very lightly during their dormant season, just a few drops from a water dropper every 10 days or so. But many gardeners don't water their Lithops at all during the dormant season. So it's up to you. I have very hard water here, so I add 6 drops of rice vinegar to every liter of water. I also add one drop of cactus fertilizer to each liter of water.

You might ask how to know the growing from the dormant season. This is a complicated subject, and if you check out the link below, there is a website with a wonderful explanation, and it's illustrated!

As far as sun goes, Lithops growing in the ground like, and can handle, a whole lot of full sun and heat. But in pots, too much sun, and especially, too much heat will cook them into mush very quickly. Also, if Lithops don't get full sun normally, then are put out on a sunny, hot day for even an hour, they'll often fade (Lithops sunburn) and turn to mush a few days later. I speak from early, bitter experience on this one.
My indoors Lithops get bright, filtered sunlight for about 6 hours a day, and occasional outdoor sunbaths on cooler days.
I hope that this very basic info will help newcomers to the Land of Lithops enjoy their amazing new plants. For more in-depth info, there are several sites on the Web. The Lithops Forum is a great place for Q&A!
Here is a terrific German website with in-depth explanations and pictures:

http://www.lithops.info/en/index.html

Happy Gardening, everyone!